

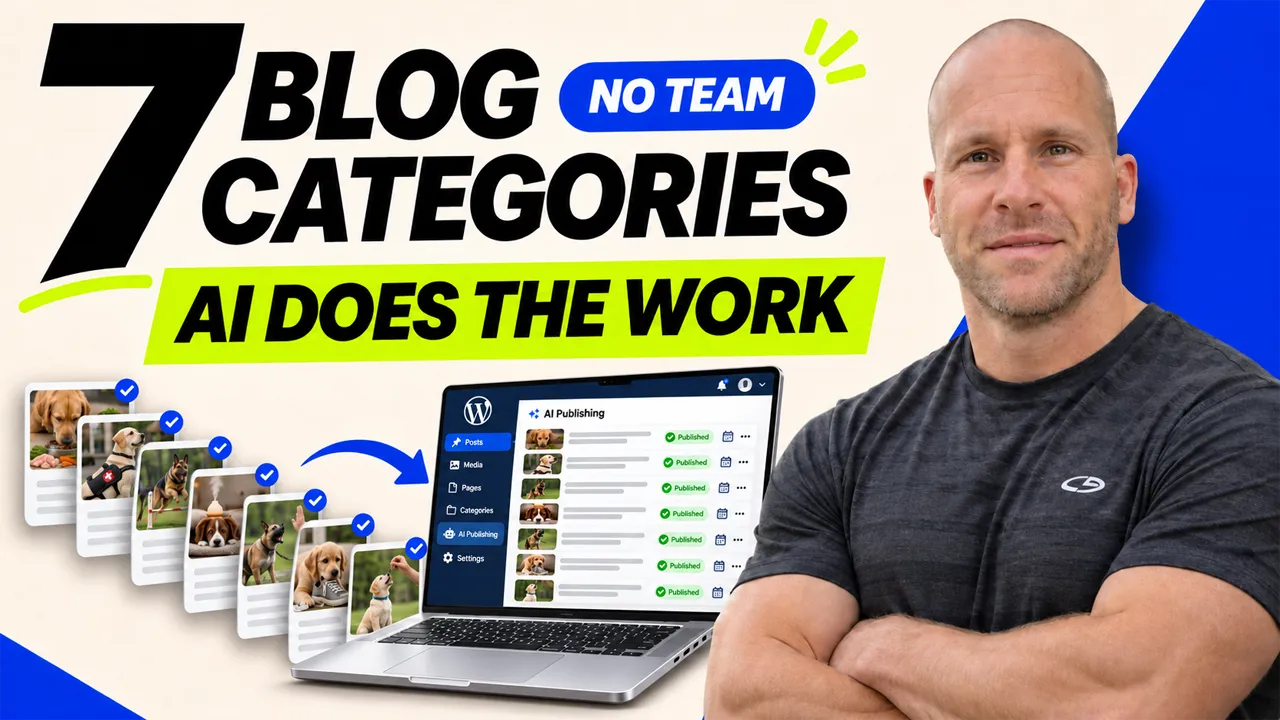
How to Auto-Publish Blog Posts in 7 WordPress Categories (With No Team)
How do you auto-publish blog posts in seven WordPress categories without a content team? Set up one AI autoblogging campaign for each category. Give each campaign a clear topic, choose its WordPress category, and set a weekly publishing day. With My Content Creator Pro Elite, ChatGPT can write the article, create images, add the SEO features you choose, and let the plugin publish the post on schedule. The plugin also has repeat-topic safeguards designed to stop campaigns from covering the same idea again and again. You do not have to type each new article yourself.
I’m Chad Portnova, the owner and developer of My Content Creator Pro Elite. In the video below, I use my real All About Dog Training WordPress website. You can see seven active campaign rows, the settings for my Advanced Dog Training campaign, and a real published article. I want you to see how the system works, what the settings mean, and what you should check on your own site.
See My Content Creator Pro Elite →
What Does Auto-Publishing in Seven Categories Mean?
A WordPress category is a place for posts about one subject. On my dog training site, a person who wants help with a puppy can read Puppy Training posts. Someone who needs advice about food can visit Dog Health & Nutrition. Those are different needs, so I keep those lessons in different categories.
An autoblogging campaign is a saved set of instructions for the plugin. It tells the AI what subject to cover, which category to use, how to write the article, and when to run. That is more than asking ChatGPT to write one post. Once a campaign is set up, the same plan can run again without me starting a new writing task each time.
Seven categories do not mean seven copies of the same article. They mean seven different areas of the site, each with its own plan. In my setup, every campaign runs once a week. I spread the days across Monday through Sunday. If all seven runs finish as planned, the website can receive one new category-based post on each day of the week.
The Seven Real Campaigns Shown on My WordPress Dashboard
Near the start of the video, I open ChatGPT Autoblogging Campaigns. The table shows the campaign title, post status, post category, interval, post count, and action buttons. Here are the seven category schedules shown on my screen, placed in day-of-week order.
| Day | Real WordPress category | Schedule | Post count shown |
|---|---|---|---|
| Monday | Dog Health & Nutrition | Once a week | 104 |
| Tuesday | Service Dog Training | Once a week | 8 |
| Wednesday | Advanced Dog Training | Once a week | 91 |
| Thursday | Anxiety Relief For Dogs | Once a week | 9 |
| Friday | Behavioral Dog Training | Once a week | 105 |
| Saturday | Puppy Behavior Management | Once a week | 9 |
| Sunday | Puppy Training | Once a week | 170 |
These are the days and post-count values visible in my dashboard when I recorded the video. They are not a prediction of what your site will publish or earn. A schedule can be paused, fail, or need attention. Counts can change as campaigns run.
Look at the days first. Each topic has one day. The post status column says publish, and the green status labels say Waiting. Waiting means a campaign is not writing an article at that moment. It is waiting for a scheduled run. There are also buttons to Edit, Pause, and View Logs. I like being able to check a campaign without opening every post.
That is the main idea behind managing categories without a team. I do the setup and keep an eye on the results. The plugin handles the repeated writing and publishing steps. If you want to see another view of this weekly plan, read my guide on keeping multiple WordPress blogs active without writing every day.
Step 1: Choose What Each Category Should Teach
Before I set up a campaign, I think about the person who will read it. A category should make sense to a visitor. On my site, Advanced Dog Training is not the same as Puppy Training. One may cover skills for a dog that has learned the basics. The other may answer questions from a new puppy owner.
Open your WordPress categories and say what each one is for in one sentence. If you cannot tell two categories apart, they may overlap too much. Fix that before you make more campaigns. Clear categories help both the AI and the person reading the finished article.
Then give the category a useful question to answer. For example, a dog owner may ask how much food to put in a bowl. A helpful article should explain how to judge a dog’s needs and when to ask a veterinarian. It should not just repeat the words “dog food” over and over. The goal is to answer the reader’s question.
For more help choosing topics, see my tutorial on finding blog topics with AI and writing the articles automatically.
Step 2: Open a Campaign Instead of Writing a Post by Hand
In the video, I work inside my WordPress admin area. The MyContentCreatorPro menu has an AI content area. I can open View AI Auto campaigns to see the seven rows, or use Add Auto AI Schedule for the setup screen. The form is called ChatGPT Autoblogging Setup.
Think of a campaign as a standing work order. I tell the plugin what kind of article belongs in one category. When its schedule comes around and the run succeeds, the plugin uses those saved settings to make the next post. If you have never built a campaign before, my beginner guide to setting up AI autoblogging in WordPress explains the main controls.
Step 3: Set the Topic and Try AI Keyword Research
The campaign I open is called Advanced Dog Training. That title tells me which subject this campaign handles. Under the title field, I show a link labeled Add your experience or source notes. There is also a Keyword Research button.
In the video, I open the keyword research box with Advanced Dog Training entered as the topic. Keyword research can help you find questions that fit the category. I still want the final title to sound like a question a real person would ask. If the tool brings back a topic that does not fit, I would not use it just because it contains a keyword.
The source-notes option is worth noticing. You can give the AI facts, a first-hand example, or a trusted source that belongs with the topic. That is one way to make content less generic. Only add notes that you can support. Do not tell the AI you tested something if you did not.
How My Plugin Helps Avoid Repeating the Same Blog Topics
One question I hear about weekly AI autoblogging is: Will it keep writing the same article over and over? This is one reason I built Strict Campaign Repeat Prevention into My Content Creator Pro Elite. I run content websites myself, and I want each campaign to keep finding useful angles within its own category as the weeks go by.
The repeat-topic checks are designed to catch subjects that a campaign has already covered. When a proposed subject is rejected as a repeat, the system can ask the AI for another relevant idea instead of simply publishing the same topic again. Other duplicate checks help avoid repeated headlines and page addresses. That matters when a campaign runs week after week for months.
Here is a simple example, not a claim about a post created during this video. An Advanced Dog Training campaign might cover one skill this week and a different skill next week. It should not keep making small changes to the title while teaching the same lesson each time. The repeat-prevention system is meant to lower that risk without making you write the new articles by hand.
If a suggested topic is too close to one already used, the campaign can hold that attempt and try again. I added this safeguard to help long-running campaigns stay fresh instead of filling a website with recycled ideas. A quick review of finished content is still wise. The video shows the campaign setup; this repeat-prevention feature works behind the scenes.
Step 4: Choose Publish, ChatGPT, and the Correct Category
Three settings tell the plugin what to do with the content. In my Advanced Dog Training campaign, the Post status is Publish, the AI Provider is ChatGPT, and the Post Category is Advanced Dog Training.
If you are testing a new topic, you may prefer to save posts as drafts first. That lets you check the kind of content the campaign creates. Once you are happy with it, you can choose automatic publishing. Whether you use Publish or Draft, it is smart to check facts and images, especially for health, money, safety, or pet-care advice.
Step 5: Give Each Category Its Own Day
This is the setting that makes the seven-category plan easy to see. My Advanced Dog Training campaign shows Interval: Once a week and Publish on: Wednesday. The form also says that the WordPress site time zone is used.
The interval answers “How often?” The day answers “Which day?” If you set seven campaigns to run weekly, but put all seven on Monday, you have seven Monday jobs. That is not the same as one planned post every day. In my real schedule, I use a different day for each category.
The menu also has an option to run every minute, marked as only for testing. That is not the pace I recommend for a normal blog. Choose a schedule that gives readers useful posts and gives you a chance to check the output.
If a post appears at an odd hour, check Settings > General in WordPress to see your site’s time zone. If a campaign is paused, look at its status before expecting another article. The View Logs button can also help you check what happened on a run.
Want more detail on timing? I have a related lesson on how to schedule AI blog posts automatically in WordPress.
Automate Your WordPress Blog With Elite →
Step 6: Choose How the AI Should Write
Farther down the form, I show a 2,200-word content length setting and English as the language. I also work through the writing style and tone options. During the walkthrough, you can see Educational and Persuasive style choices, with Educational shown as the tone later in the form.
A word target gives the AI a guide. It does not mean every topic needs exactly that many words. A simple question may need a short answer. A full lesson may need many steps. The final article should be as long as it needs to be, without padding.
I want a reader to learn something from the article. On a dog training site, a clear lesson might use short headings, simple words, and steps that are safe to follow. A persuasive style should not mean making big claims. If a statement cannot be supported, it needs to be changed or removed.
Step 7: Turn On the SEO Features That Help Readers
In my video, SEO Optimize and SEO Meta Generator are turned on. The form also shows Generate FAQ and Generate Conclusion turned on. The Generate Tags option is turned off in the screen I show.
Here is what those choices mean in plain language:
- SEO Optimize: Helps the AI shape the page around its topic. It does not promise a Google ranking.
- SEO Meta Generator: Helps prepare a search title and description for the post.
- Generate FAQ: Adds short answers to useful questions a reader may still have.
- Generate Conclusion: Helps finish the article with a clear next step or summary.
- Generate Tags: This option is off in my example. Tags are not required for every post.
These settings save work, but each section still needs to earn its place. An FAQ should answer a new question. The conclusion should help a visitor know what to try next. A meta description should tell the truth about the page, not promise something the article does not deliver.
I follow Google’s helpful, reliable, people-first content guidance. That means creating posts to help readers first. SEO can make a useful page easier to find, but SEO settings, word count, and AI writing do not guarantee an AI Overview, high search position, or extra traffic.
Step 8: Use Smart Internal Links to Join Related Lessons
Another option I show is Enable Internal Links. It is on, and the Internal Link Target is set to Smart / Automatic. An internal link sends a reader to another useful page on the same website.
Imagine a visitor reads about teaching a dog to sit. A link to a related lesson about calm behavior may help. A link to an unrelated article would not. The Smart / Automatic setting is designed to use the article length and relevant published pages instead of forcing links where they do not belong.
In the form, I can see a note saying existing links count toward the target, and irrelevant links are not forced. That matters because useful links give people a way to keep learning. I still check finished posts for broken links or links that lead to the wrong topic.
If you want to learn more about this one feature, read my guide to adding internal links to WordPress blog posts automatically.
Step 9: Let the AI Add Images and a YouTube Video
Making images for every new post can take time. In the campaign form, I set the Number of Images to 3 Images and the Image Generation Source to ChatGPT. The note on the screen says those three images go inside the article. The featured image is created separately.
That is an important difference. If you set three body images, do not assume that means three images total, including the picture at the top. The form treats the featured image as its own part of the process.
I also show Add YouTube video turned on. The video placement choice is set to Top of Page. Another option places it near the end. You can choose the spot that makes sense for the lesson. The form notes that some YouTube videos may not allow embedding, so the system uses videos that can be embedded when possible.
I have separate tutorials on adding AI images to WordPress blog posts and adding YouTube videos to WordPress blog posts automatically.
Step 10: Check the Schedule and Let the Campaign Work
At the bottom of the form, you can see the Schedule Article button. Before I save a campaign, I read the important fields together: topic, post category, post status, interval, and day. If one of them is wrong, the article could go to the wrong place or appear at the wrong time.
Still, automation needs a way to check its work. From the campaign list, I can use Edit to change settings, Pause to stop a campaign, and View Logs to look into a problem. Those controls matter more than a flashy promise that a tool will run perfectly forever.
If a proposed topic repeats an older one, the repeat-prevention system can reject it and try another. If a scheduled post needs attention, the status and logs help you see why. This gives you both automated writing and tools to manage the campaigns with confidence.
If you want to plan more than one week, see my tutorial on planning a 30-day WordPress autoblogging content queue.
Step 11: See a Real Published Article in WordPress
Later in the video, I leave the campaign settings and open a published dog-care article called How to Measure Dog Food Portions by Body Condition. This is a separate example of a finished article on my website. It is not a claim that the Advanced Dog Training campaign wrote a dog-food article during the recording.
On the public page, you can see the article text and sections about how to judge a dog’s body condition. I then open the WordPress editor. There, the post shows a featured image, headings, text, and the Yoast SEO area. The editor displays a word count of about 2,240 words at the time of recording.
I like showing the finished post because a settings screen alone cannot tell you whether a reader gets a good article. You need to look at the page the visitor sees. Does the title match the content? Can a person follow the steps? Do the pictures fit? Does the advice need a trusted source or review? Those questions matter even when AI does the writing.
What the AI Does and What You Still Control
I do not want anyone to leave this video thinking they need to write seven new articles every week. That is the work the automation is meant to handle. Here is the simple split.
| You set or check | The plugin and AI can handle |
|---|---|
| Choose the topic and WordPress category | Generate articles for the saved topic |
| Give each campaign a clear subject | Check proposed topics for repeats and try a different relevant idea when needed |
| Choose a weekly day and post status | Run on the selected schedule and publish when set to Publish |
| Pick length, style, tone, and options | Create the article text, headings, FAQ, and conclusion |
| Choose image and video settings | Generate images and try to add an embeddable video |
| Check accuracy, links, and live pages | Prepare SEO fields and relevant internal links when enabled |
Simple Checks Before You Turn On All Seven Campaigns
Start with one campaign. Let it produce a post, then read that post like a new visitor. When you know the settings are working as you want, move to the next category. This makes mistakes easier to find than turning on seven brand-new schedules at once.
- Check the subject. Does the post answer a clear question for the category?
- Check the facts. Are names, steps, numbers, and safety advice correct? Use trustworthy sources when needed.
- Check the day and time zone. Is the campaign set for the day you expect?
- Check the pictures. Does each image truly match the lesson?
- Check the links and video. Do they work and help the reader?
- Check on a phone. Are the headings, text, and table easy to read?
- Check for repeats. The plugin has safeguards against repeated topics, but does the finished post still teach something new?
For more help balancing output with useful content, read how to publish more WordPress blog posts without sacrificing quality. You can also see my guide on keeping your WordPress blog fresh with AI.
Frequently Asked Questions About Seven-Category Autoblogging
Can AI publish a WordPress article every day without me writing it?
Yes. If you have seven working weekly campaigns set for different days, the plugin can create and publish the posts automatically on those days. You set up the campaigns first. A successful run still depends on the plugin, site, and AI connection working as expected.
Can each category have a different publishing day?
Yes. My real dashboard shows one weekly campaign assigned to each day, from Monday through Sunday. In the video, the Advanced Dog Training campaign is set for Wednesday. The WordPress site’s time zone is used for the schedule.
How does My Content Creator Pro Elite help stop repeated articles?
Its Strict Campaign Repeat Prevention system checks proposed subjects for repeats and seeks another relevant idea when needed. It also helps avoid repeated headlines and page addresses. That means a long-running campaign can keep exploring new questions in its category instead of using the same topic every week. I still suggest a quick check of the finished posts.
Does the plugin add images, FAQs, and internal links?
Those are options shown in my video. I have the FAQ, conclusion, and smart internal-link settings enabled. I show three images selected for the article body, with a separate featured image. The settings you choose control which features the campaign tries to use.
Is seven categories the best number for every WordPress blog?
No. Seven is the plan on my dog training site. Your blog may need three categories or ten. The right number depends on the subjects your readers care about and whether the categories are different enough to be useful.
Will seven automated categories guarantee higher Google rankings?
No. A weekly schedule does not guarantee traffic, rankings, AI Overview placement, or sales. Useful articles need correct facts, a clear purpose, and good reader experience. The schedule helps with consistency. It does not replace content quality.
Can I check or stop an autoblogging campaign?
Yes. The campaign list in the video has Edit, Pause, and View Logs controls. You can review the settings, pause a campaign, or look at logs if something does not run as expected.
My Final Advice: Start With One Category, Then Build the Week
My goal with this video is simple. I want you to see a real way to keep several WordPress categories active without a content team. The AI does the article writing. My Content Creator Pro Elite manages the campaign settings and scheduled publishing. I still choose the topics, make sure each one belongs in the right category, and check the content that visitors will read.
Start by choosing one topic and one weekly day. Use that first campaign to learn the settings. Then add the other categories when you are ready. If the days are spread across the week, seven weekly campaigns can give your site a daily publishing plan without asking you to write a new article every morning.
I built My Content Creator Pro Elite to make that kind of WordPress work easier. If you want to see the tool I use in this video, you can learn more below.
Get My Content Creator Pro Elite →
By Chad Portnova — Owner and Developer of My Content Creator Pro Elite