
Key Takeaways
- My Content Creator Pro Elite lets you create SEO-optimized autoblogging posts with ChatGPT inside WordPress.
- You can automate titles, full articles, tags, FAQs, and conclusions with the plugin.
- The tool gives you control over topic, draft/publish mode, category, word count, language, style, and tone.
- Built-in SEO settings help structure content for Google, Bing, Yahoo, and AI search visibility.
- Autoblogging campaigns can run automatically on a schedule, allowing your site to keep publishing without manual writing.
- Draft mode lets you review posts before publishing, which is helpful for quality control and SEO refinement.
- The Elite version is ideal for bloggers, affiliate marketers, niche site builders, and WordPress users who want to scale content faster with AI.
If you want to write SEO-optimized autoblogging blog posts with ChatGPT in WordPress, this is one of the fastest ways to do it.
Instead of manually brainstorming topics, writing 2,000-word articles, adding tags, building FAQs, and creating conclusions one post at a time, you can automate the entire workflow directly inside WordPress.
With My Content Creator Pro Elite, you can use ChatGPT to generate blog posts around your chosen topic and keep your WordPress website updated with fresh content on a schedule.
In this guide, you’ll learn how the system works, what settings matter most, and how to use the plugin to create AI-powered blog posts that are structured for SEO and readability.
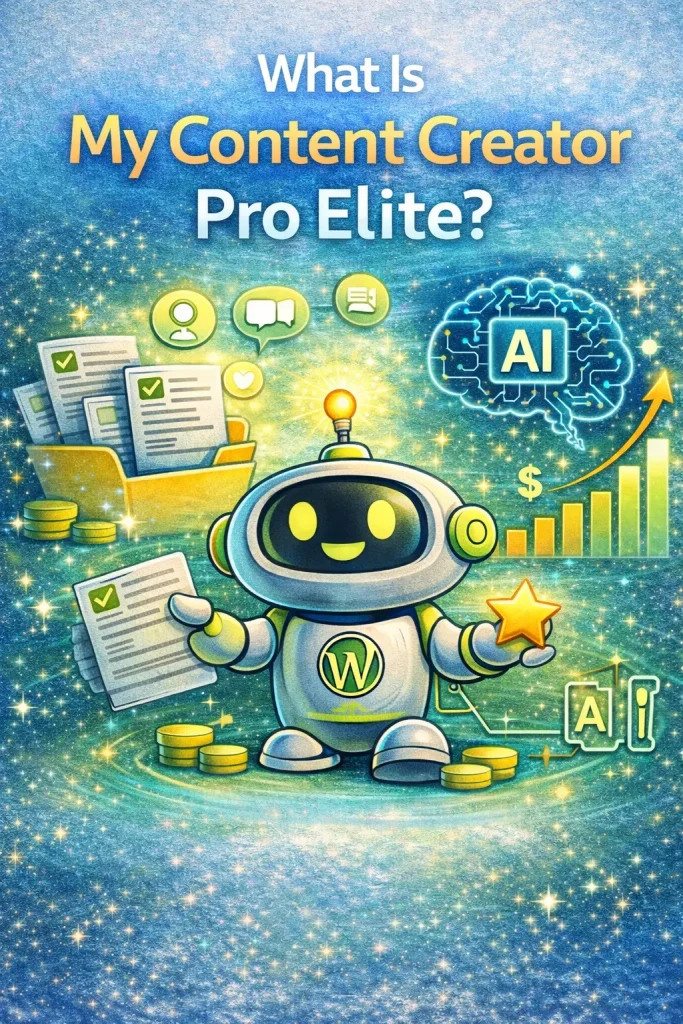
What Is My Content Creator Pro Elite?
My Content Creator Pro Elite is the advanced version of the My Content Creator Pro plugin.
While the free version focuses on giving users access to a huge ready-made content database, the Elite version adds ChatGPT-powered content generation, allowing you to create brand-new blog posts automatically inside WordPress.
With the Elite version, you can:
- create AI-generated blog posts around any topic
- choose a post category
- set articles as drafts or publish them automatically
- control word count
- choose language, tone, and writing style
- generate SEO elements like tags, FAQs, and conclusions
- schedule recurring autoblogging campaigns
This makes it much easier to scale a content website without having to write every post manually.
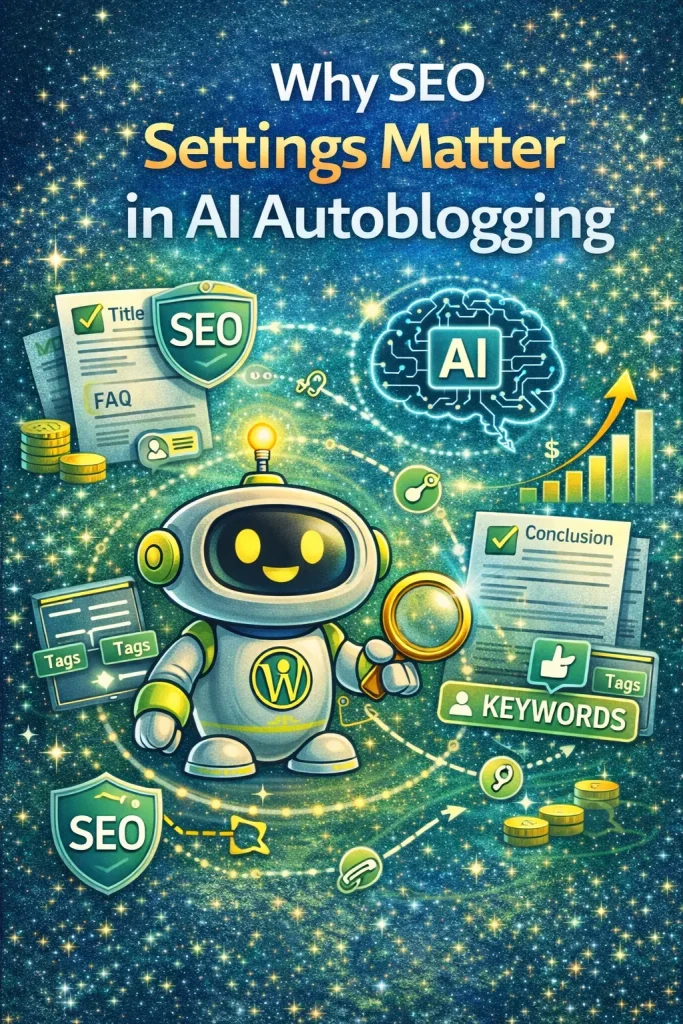
Why SEO Settings Matter in AI Autoblogging
A lot of AI content tools can generate text.
That doesn’t mean they generate content that is structured well for search engines.
The reason this setup stands out is because it isn’t just “write an article and hope for the best.” It’s designed around SEO structure.
When configured correctly, your generated posts can include:
- an SEO-oriented article structure
- tags that help clarify the topic
- an FAQ section to improve helpfulness
- a conclusion that wraps the article up properly
- tone and style settings that match your site
That combination helps make the content more useful for both readers and search engines.
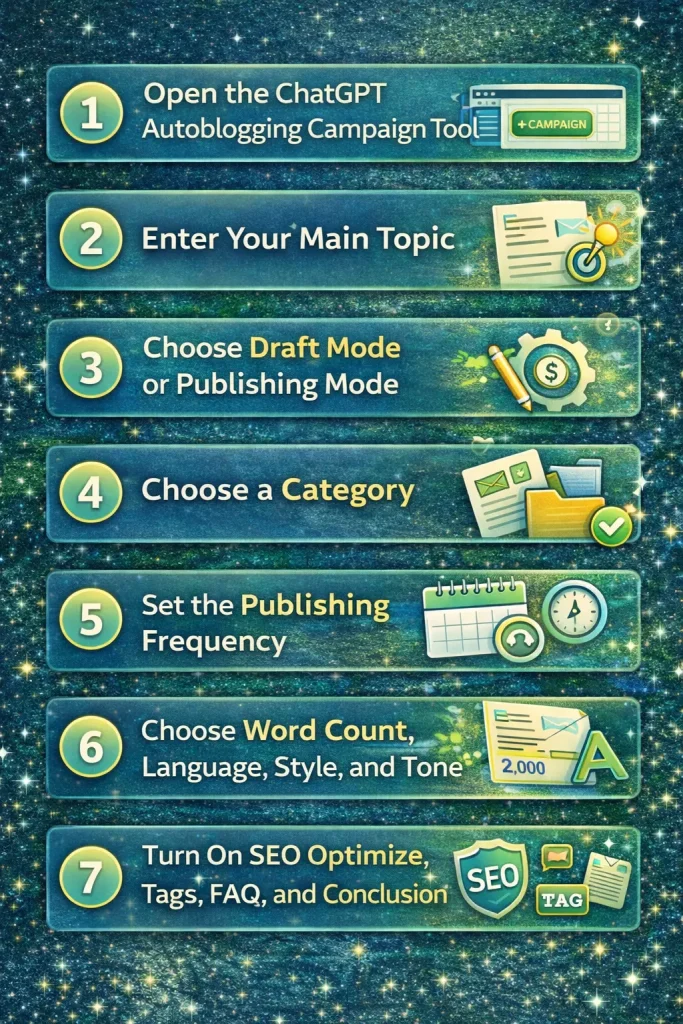
Step 1: Open the ChatGPT Autoblogging Campaign Tool
After installing the Elite version, log into your WordPress dashboard and go to the section for creating a new ChatGPT autoblogging campaign.
In the video demo, the workflow starts from the area where you can:
- create a new campaign
- enter your main topic
- define how often posts should be written
- adjust SEO and content settings
This is where you set up the automation.
Step 2: Enter Your Main Topic
The first thing you do is enter the main topic you want ChatGPT to write about.
In the demo, the example topic was:
Make money online
That means the plugin will keep generating blog posts related to that overall subject, covering different angles and subtopics over time.
You can use this same approach for almost any niche, including:
- affiliate marketing
- home improvement
- dog training
- anxiety support
- AI marketing
- WordPress tutorials
- eCommerce
- local business content
The topic becomes the foundation for the ongoing autoblogging campaign.
Step 3: Choose Draft Mode or Publishing Mode
One of the most useful settings in the demo is the ability to publish posts as drafts first.
That gives you the ability to:
- review the content
- make edits if needed
- add your own links or affiliate offers
- check the formatting
- improve the final post before it goes live
This is especially helpful when you’re first getting used to the system.
Later, once you feel confident in the output quality, you can automate more aggressively.
Step 4: Choose a Category
Next, choose the WordPress category you want the generated posts to appear under.
This helps keep your site organized and ensures new AI-generated content is placed in the correct content silo.
Good category structure matters because it helps with:
- internal organization
- user experience
- better topical grouping
- stronger internal linking opportunities
Even with automation, structure still matters.
Step 5: Set the Publishing Frequency
The demo showed a test setting of every minute, but that was clearly presented as a testing setting only.
For real-world use, the better approach is slower and more natural.
Typical publishing schedules include:
- once every few hours
- once per day
- every few days
- once per week
A slower pace is generally better for most sites unless you’re running a fast-moving news project.
For niche sites, a consistent pace such as 1–2 posts per day is often more realistic and sustainable.
Step 6: Choose Word Count, Language, Style, and Tone
This is where the plugin becomes very flexible.
In the demo, the article settings included:
- 2,000-word articles
- English language
- Professional writing style
- Educational tone
These settings help shape the kind of article ChatGPT will produce.
For example:
- a professional style works well for tutorials and niche blogs
- an educational tone is great for SEO articles and informational content
- different languages help expand beyond English audiences
- longer word counts can support more in-depth content
This is important because not every AI article should sound the same.
Step 7: Turn On SEO Optimize, Tags, FAQ, and Conclusion
This is one of the most important parts of the workflow.
In the demo, these settings were turned on:
- SEO Optimize
- Generate Tags
- Generate FAQ
- Generate Conclusion
Each one plays a different role.
SEO Optimize
This helps structure the content for search visibility and better on-page organization.
Generate Tags
Tags help define what the article is about and can improve your post organization inside WordPress.
Generate FAQ
FAQs are valuable because readers often have follow-up questions. They also help make the page more complete and useful.
Generate Conclusion
A conclusion helps wrap up the article and gives readers a clear takeaway or next step.
Together, these settings create a much stronger final blog post than a plain wall of AI text.
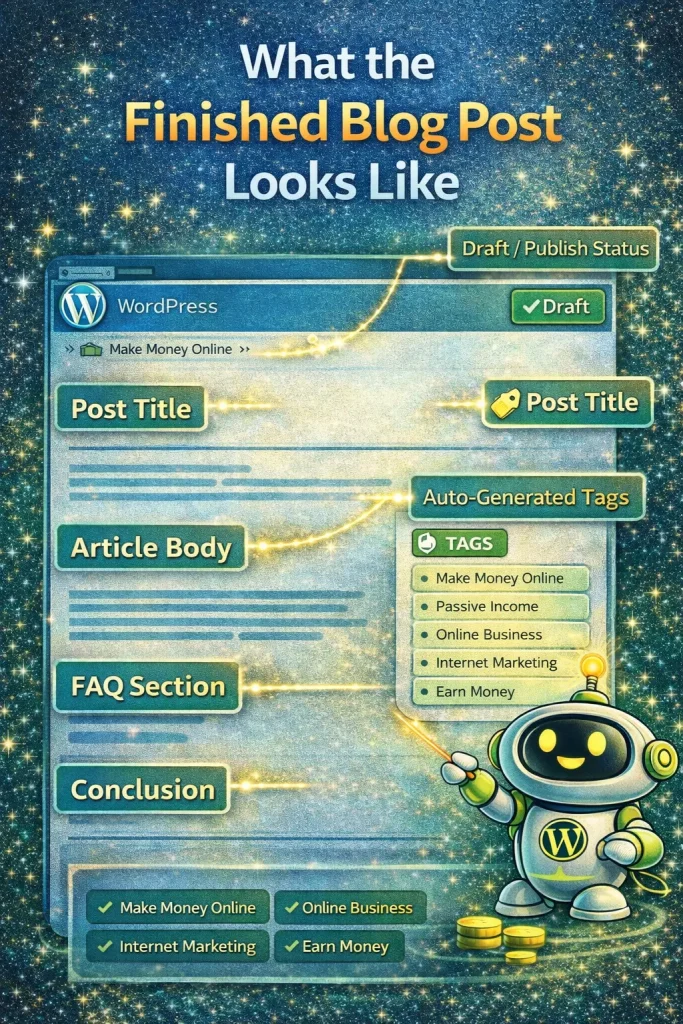
What the Finished Blog Post Looks Like
Once the article is generated, you’ll see:
- the post title
- the article body
- auto-generated tags
- the FAQ section
- the conclusion
- the category assignment
- draft or publish status
In the demo, the system created a full post around the topic of making money online and automatically included the SEO elements selected in the settings.
This is what makes the tool more useful than just asking ChatGPT to “write me a blog post.”
It creates a more complete WordPress-ready article.
Managing and Editing Your Campaigns
After creating a campaign, you can go back and edit the settings later.
For example, you can change:
- publishing frequency
- topic
- category
- draft or publish mode
- content settings
In the demo, the campaign was adjusted from every minute to a more realistic schedule.
That flexibility matters because it lets you test and refine your automation over time instead of locking yourself into one setup.
Why Draft Mode Is Smart for SEO
Even though the system can automate content, draft mode is often the best place to start.
Why?
Because it gives you one final layer of control before publishing.
You can:
- update the title
- improve the intro
- add internal links
- insert product links
- add featured images
- fine-tune the conclusion
- check for any dates or wording you want to adjust
That balance between automation and oversight is what makes AI autoblogging much stronger.
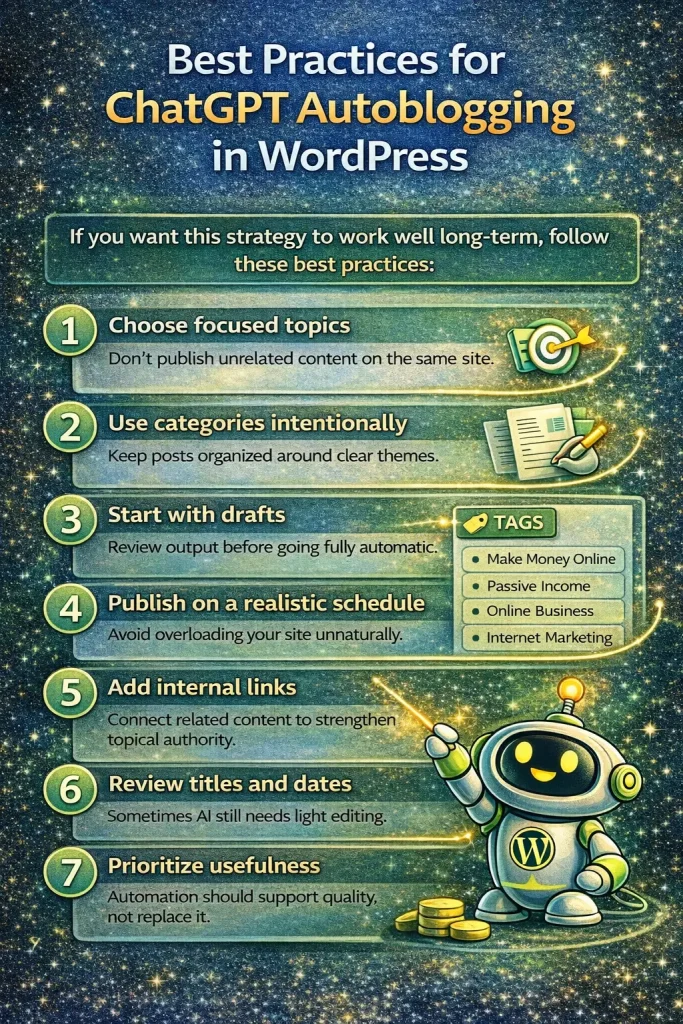
Best Practices for ChatGPT Autoblogging in WordPress
If you want this strategy to work well long-term, follow these best practices:
1. Choose focused topics
Don’t publish unrelated content on the same site.
2. Use categories intentionally
Keep posts organized around clear themes.
3. Start with drafts
Review output before going fully automatic.
4. Publish on a realistic schedule
Avoid overloading your site unnaturally.
5. Add internal links
Connect related content to strengthen topical authority.
6. Review titles and dates
Sometimes AI still needs light editing.
7. Prioritize usefulness
Automation should support quality, not replace it.
Who Should Use This Feature?
This Elite ChatGPT autoblogging feature is especially useful for:
- affiliate marketers
- niche site builders
- bloggers scaling content
- local marketers
- agency owners
- content site operators
- WordPress users who want to save time
If your biggest bottleneck is content production, this kind of automation can remove a huge amount of manual work.
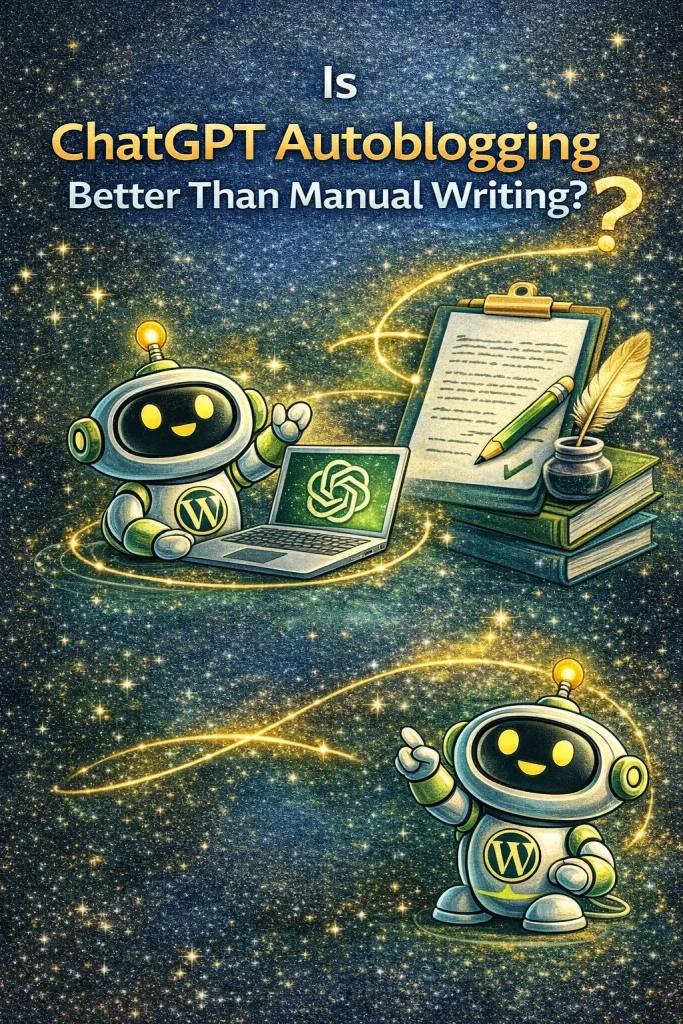
Is ChatGPT Autoblogging Better Than Manual Writing?
It depends on your goals.
If you want fully hand-crafted content with personal stories and original research, manual writing still has its place.
But if your goal is to:
- cover more keywords
- build topical authority faster
- publish consistently
- save time
- scale a site efficiently
Then ChatGPT autoblogging can be a huge advantage.
The strongest strategy is often a hybrid:
- use automation for speed
- use human review for polish and monetization
Frequently Asked Questions
What is ChatGPT autoblogging in WordPress?
ChatGPT autoblogging in WordPress means using AI to automatically generate blog posts inside your WordPress website based on a chosen topic and publishing schedule.
Can My Content Creator Pro Elite write full blog posts automatically?
Yes. The Elite version can generate full blog posts, including titles, article content, tags, FAQs, and conclusions.
Is it better to publish AI posts as drafts first?
Yes. Draft mode is recommended when you first start so you can review and improve the content before publishing.
Can I choose the tone and writing style?
Yes. The plugin includes multiple writing styles and tones, as well as language settings and word-count controls.
Does the Elite version help with SEO?
Yes. The plugin includes built-in SEO-focused settings such as SEO optimization, generated tags, FAQs, and conclusions designed to improve structure and usability.
What is the difference between the free and Elite versions?
The free version gives you access to a large article database and autoblogging tools. The Elite version adds ChatGPT-powered AI writing and advanced automation features.
Can I schedule posts automatically?
Yes. You can create recurring campaigns and control how often articles are generated and added to your WordPress site.
Final Thoughts
If you want to create SEO-optimized autoblogging blog posts with ChatGPT inside WordPress, this is one of the most practical ways to do it.
Instead of trying to juggle prompts, formatting, tags, FAQs, and scheduling manually, the Elite version of My Content Creator Pro gives you a structured way to automate the process.
That means:
- faster content production
- more consistent publishing
- stronger scalability
- better organization inside WordPress
When used correctly, this kind of AI automation can help you build content sites faster while still keeping control over quality and structure.